When buyers scroll through listings online, they make split-second decisions based almost entirely on photos. 97% of buyers search for homes online before they ever set foot through a door, and the top listing photography tips for home sellers come down to one straightforward truth: your photos are your first showing. In competitive markets like Toronto and Innisfil, where Friday Harbour waterfront properties attract discerning buyers, your listing images either create immediate desire or send someone scrolling to the next property. This guide gives you the practical, field-tested photography advice I share with my own clients.
Key takeaways
| Point | Details |
|---|---|
| Staging before the shoot | Declutter and depersonalise every room to let architecture and space speak to buyers. |
| Timing your shoot matters | Shoot during soft daylight hours and schedule exterior shots at golden hour for warmth and appeal. |
| Camera technique changes everything | Chest-height camera position and a 16–24mm lens create realistic, flattering room proportions. |
| Professional photography pays off | A professional photography investment starting around $150 measurably reduces time on market. |
| Photo order tells a story | Sequence shots from exterior through living spaces to features, guiding buyers on an emotional walkthrough. |
1. The foundation: staging, decluttering, and preparing your home
Before a single photo is taken, the preparation you do inside your home determines whether the shoot succeeds or falls flat. This is where most sellers either gain or lose the advantage.
83% of buyers say that staging significantly helps them visualise a property as their future home. That statistic matters because it tells you buyers are not just looking at rooms. They are imagining their life inside them. Simple staging does not require a professional service. It requires intentionality.
Here is what I recommend to every seller before photo day:
- Remove personal items. Family photos, trophies, and collections remind buyers this is someone else’s home. Clear them away.
- Clear every surface. Countertops, coffee tables, and shelves should hold very few objects. Negative space in photos helps buyers focus on architecture and natural light, which makes rooms feel larger.
- Deep clean everything. Fingerprints on appliances, marks on walls, and dusty blinds all show up in photos. What you overlook in daily life becomes glaring under a camera lens.
- Arrange furniture for flow. Pull furniture slightly away from walls. Create obvious pathways through each room. This reads as spacious and intentional on camera.
- Add subtle, neutral accents. Fresh flowers, a folded throw blanket, or a bowl of fruit add warmth without overwhelming the space.
Pro Tip: Do your staging walkthrough the night before the shoot, not the morning of. You will have time to fix anything you missed, and your photographer will not be waiting while you scramble to clear kitchen counters.
2. Camera height, angles, and composition that flatter every room
Here is something most sellers do not think about: where you hold the camera changes everything. The technical side of real estate photography is not complicated, but getting it right is the difference between a photo that reads as professional and one that looks accidental.
Follow these steps for consistently strong shots:
-
Shoot at chest or navel height. This approximates a natural human eye-level perspective. Shooting too high creates a bird’s-eye view that shrinks rooms. Shooting from the floor makes ceilings loom awkwardly.
-
Use the three-wall rule. Position yourself in a corner of the room and angle toward the opposite corner. Corner shooting creates depth and dimension rather than flat, one-wall compositions that look like passport photos of a room.
-
Choose a 16 to 24mm focal length. This is the sweet spot for real estate photography. 16 to 24mm focal lengths capture enough of a room to show its true size without the warping distortion of an ultra-wide or fisheye lens. Distorted rooms erode buyer trust the moment they arrive for a showing and realise the kitchen is smaller than it appeared.
-
Keep your vertical lines straight. Leaning the camera up or down even slightly makes walls appear to tilt. Use the grid feature on your camera or smartphone to keep the horizon level and verticals perfectly plumb.
-
Find the room’s focal point. In a living room, that might be a fireplace or a view window. In a kitchen, it could be an island or feature backsplash. Frame your shot so that focal point draws the eye naturally.
-
Shoot multiple angles per room. You want options in post. Take a wide establishing shot, then a tighter angle that highlights a specific feature. You will choose the best one when editing.
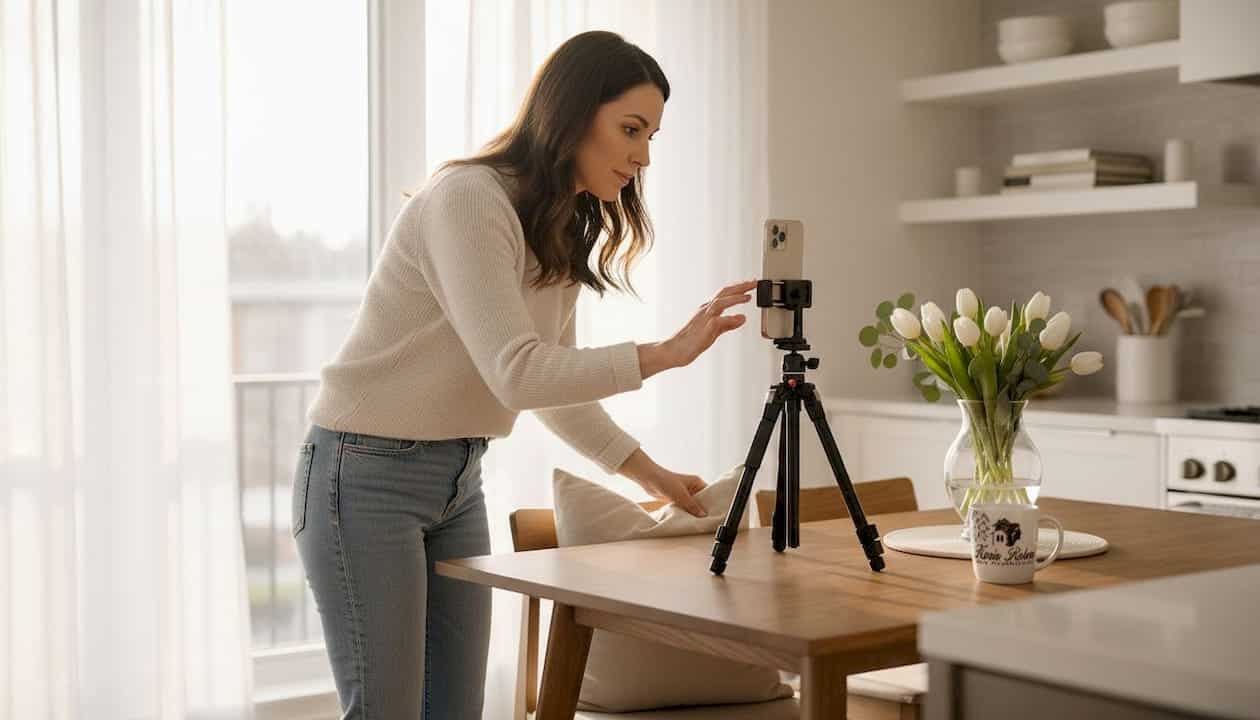
Pro Tip: A tripod is one of the single best investments you can make for DIY listing photos. It stabilises your shot, keeps your camera perfectly level, and allows you to use slower shutter speeds in lower light without blur. A basic model costs under $50 and makes an immediately visible difference in photo quality.
3. Lighting and timing: when and how to shoot for the best results
Lighting is what separates a photograph that feels warm and inviting from one that looks cold and clinical. You have more control over this than you might think.
- Shoot during soft daylight hours. Mid-morning or mid-afternoon on a bright but overcast day is ideal. Harsh mid-day sun creates strong shadows and blown-out windows. Cloudy days diffuse light evenly across a room.
- Open all blinds and curtains fully. Natural light is your most flattering light source. Let as much of it in as possible, and shoot toward interior walls rather than directly into windows where possible.
- Use consistent indoor lighting. Turn on every light in the room, including lamps. But be aware that mixing warm incandescent bulbs with cool daylight creates colour casts that are difficult to correct in editing. Where possible, replace mismatched bulbs with consistent daylight-temperature LEDs before the shoot.
- Turn off ceiling fans. Even at slow speeds, fan blades create motion blur in photos. Turn them off entirely.
- Avoid flash on-camera. Direct flash creates flat, harsh lighting with unflattering shadows. If you need supplemental light, use softbox lights or bounce flash off a ceiling.
- Schedule exterior shots for golden hour. The hour after sunrise or before sunset gives your home’s exterior a warm, golden glow that photographs beautifully. Balanced exposure preserves both interior detail and window views, which is especially valuable for waterfront properties where the outdoor view is a selling feature.
4. DIY versus hiring a professional photographer
This is a question I get from sellers regularly, and the honest answer depends on your property, your budget, and your market.
| Factor | DIY photography | Professional photographer |
|---|---|---|
| Upfront cost | Minimal, uses your own phone or camera | Typically starts around $150 |
| Equipment quality | Limited by what you own | Professional-grade cameras, lenses, lighting |
| Editing capability | Basic apps, moderate results | Advanced editing, HDR blending, colour correction |
| Time investment | Several hours on shoot day plus editing | Roughly 90 minutes on-site, handled by photographer |
| Best suited for | Small, well-lit properties in lower price ranges | Most homes, especially in competitive or luxury markets |
| Impact on sale | Adequate results if done carefully | Measurably reduces days on market |
For most sellers in the Toronto and Innisfil markets, the investment in professional photography makes practical sense. Professional photos have a measurable impact on a listing’s speed of sale and final sale price. Given that over 50% of listings lingered on market beyond 60 days in early 2026, anything that reduces that timeline is worth considering carefully.
When hiring a photographer, look for someone with a real estate portfolio specifically. Architecture photography and real estate photography are different disciplines. Ask to see recent interior work, and confirm that their package includes edited, high-resolution files suitable for MLS upload.
Pro Tip: Professional photographers spend about 90 minutes on-site, and your home must be fully ready when they arrive. Any delay eats into your shoot time. Prepare everything the night before: staging done, surfaces cleared, lights checked, and fans off. Walk through every room with fresh eyes the morning of the shoot.
5. Sequencing your photos to tell a visual story
Great individual photos matter. But the order in which buyers see those photos matters just as much. A well-ordered photo sequence tells a story and helps buyers visualise the flow of a home. A random or illogical order breaks that spell and leaves buyers confused about the layout.
Here is the sequence I recommend for most listings:
- Start with a strong exterior front shot. This is your listing’s cover image and the first impression that stops the scroll.
- Move inside with an entryway or foyer shot that transitions the buyer from the exterior into the home.
- Show the main living areas next: living room, dining area, and any open-plan connections between them.
- Feature the kitchen prominently, including any upgrades like countertops, appliances, or an island.
- Progress through bedrooms, with the primary bedroom first and secondary rooms following.
- Show all bathrooms, with the primary ensuite given special attention.
- Close with lifestyle or feature shots: a backyard, a view, a fireplace, a gym, or a dock if you have one.
Keep your total photo count between 20 and 35 images. Fewer than 20 leaves buyers feeling they have not seen enough. More than 35 and you risk repetition that dilutes the impact of your strongest shots. Every image in the set should earn its place. Listing photos that serve as a conversion system stop scrolling and communicate value immediately. Redundant shots of the same hallway from two angles do the opposite.
For waterfront or lifestyle properties in communities like Friday Harbour, include shots that capture what it actually feels like to live there. A dock at sunrise, a view from the balcony, or a well-staged outdoor seating area adds emotional weight that floor plans cannot deliver. You can also maximise your MLS listing exposure by pairing standout photos with a thoughtful description that reinforces what buyers see.
My honest take on listing photography
What I’ve learned working with sellers across Toronto, Innisfil, and Friday Harbour is that most photography mistakes happen before the camera comes out. Sellers underestimate how much preparation shapes the result. I’ve seen beautifully staged homes photographed in flat, grey midday light that looked lifeless online. And I’ve seen modest homes with thoughtful staging and ideal lighting that generated multiple offers.
I always tell my clients: photos are the front door of your sale. They must be truthful, because buyers who arrive expecting more than photos show will walk away disappointed and distrustful. But within those bounds, your job is to present the home at its absolute best.
The sellers who get the most from their photography investment are the ones who do the work the night before. They clear the clutter, set the staging, and hand the photographer a home that is genuinely ready. That preparation, combined with strong technique or professional expertise, is what creates photos worth bookmarking.
— Karin Rotem
Ready to list with photography that performs?
At Karinrotem, professional marketing is built into every listing we take on. That includes high-quality photography that reflects the true character of your home, whether it is a waterfront retreat in Friday Harbour, a family home in Innisfil, or a property in the Toronto market. We have seen first-hand how strong visual presentation shortens time on market and attracts more serious buyers. Explore our current properties to see the presentation standard we bring to every listing, or browse my listings to see recent examples. If you are preparing to sell and want guidance tailored to your specific property, we would love to connect and walk you through the process.
FAQ
How many photos should a home listing include?
Most listings perform best with 20 to 35 photos. This range gives buyers enough to feel confident about the layout and features without overwhelming them or repeating shots unnecessarily.
Is professional photography worth it for a smaller home?
Yes, in most cases. Professional photography typically starts around $150 and has a measurable effect on reducing days on market, which more than offsets the cost even for modestly priced properties.
What is the best time of day to photograph a home?
Mid-morning or mid-afternoon on a bright day provides soft, even light for interiors. Golden hour, the hour before sunset, is ideal for exterior shots and produces warm, appealing images.
Can I use my smartphone for listing photos?
Modern smartphones can produce acceptable results for smaller properties if you use a tripod, shoot during good light, and prepare the space thoroughly. For most listings in competitive markets, a professional photographer will deliver significantly better results.
What is the three-wall rule in real estate photography?
The three-wall rule means positioning yourself in a room’s corner and shooting toward the opposite corner. This technique creates depth and dimension in photos, making rooms appear more spacious and well-proportioned.